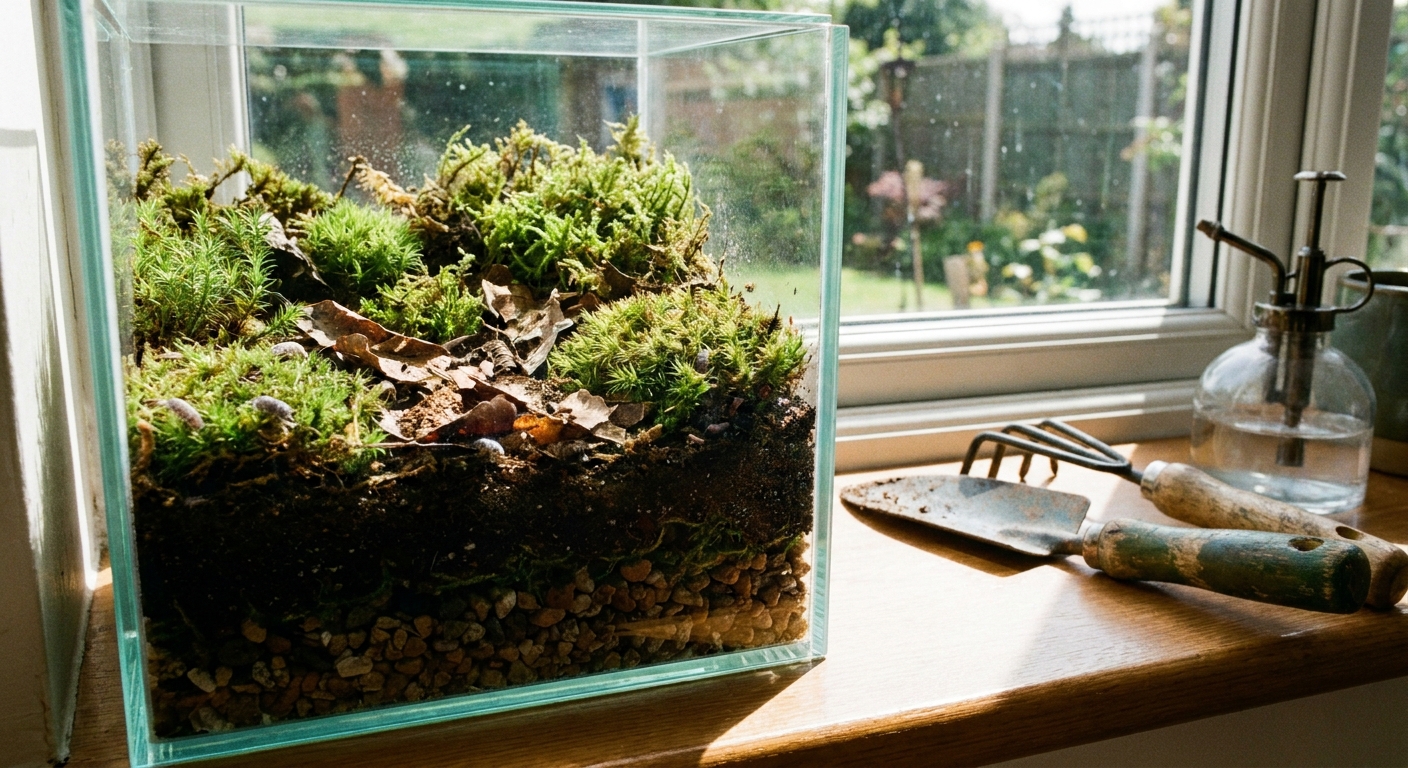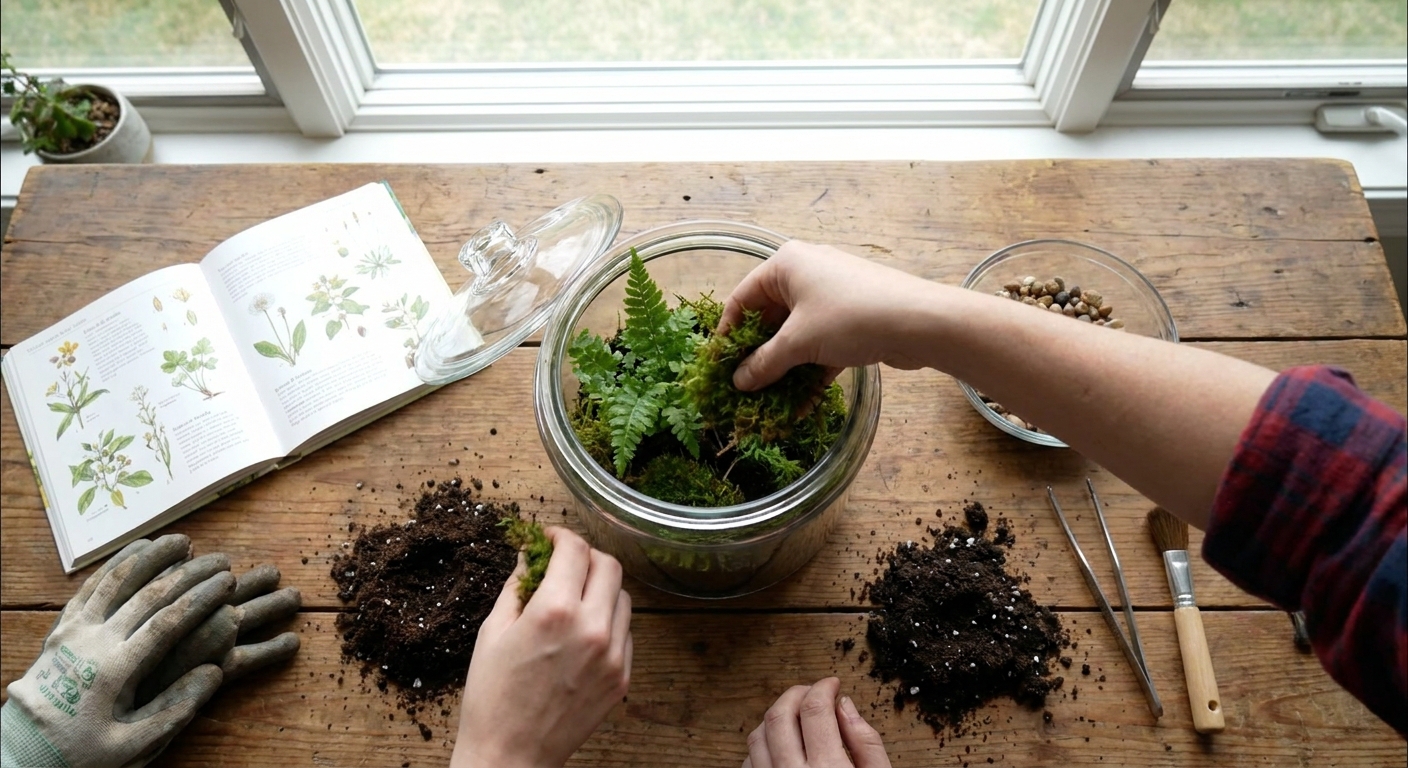
A terrarium is a small act of habitat-making: soil layered like strata, roots slipping between grains of sand, condensation beading on glass like morning fog. It’s part horticulture, part ecology experiment, and part sculpture. In this guide, we’ll walk through the fundamentals of terrarium building—from plant and moss selection to drainage, bioactive cleanup crews, and long-term care—so you can curate a thriving world under glass.
Introduction: A Pocket Forest on Your Windowsill
Step 1: Choosing the Right Vessel
Your container sets the climate.
Closed vs. Open
- Closed terrariums (jars with lids, corked bottles, cloches)
- Best for humidity-loving tropicals and mosses
- Creates a self-dampening cycle: evaporation → condensation → rain
- Ideal plants: ferns, mosses, small aroids, peperomias, pileas
- Open terrariums (bowls, wide-mouthed vases)
- Better for drier, airier conditions
- Works for semi-tropicals that dislike constantly wet foliage
- Ideal plants: small peperomias, fittonias, some succulents outside the densest center zone
Choose clear glass to enjoy every layer and observe roots and microfauna. Avoid containers that narrow too sharply at the top unless you’re comfortable planting with long tweezers.
Step 2: Layering the Foundation (Drainage & Substrate)
Think of the base of your terrarium like a forest floor profile: rock, litter, soil.
1. Drainage Layer
Purpose: Catch excess water and keep roots from sitting in a stagnant swamp.
Options:
- Leca (lightweight expanded clay aggregate) – Lightweight, reusable, ideal for most builds
- Lava rock or pumice – Highly porous, excellent for bioactive setups
- Coarse aquarium gravel – Works, but lacks the porosity of lava/leca
Depth: 1.5–5 cm (½–2 in) depending on container height. Taller vessels can handle deeper drainage.
2. Barrier Layer (Optional but Recommended)
A barrier keeps soil from sifting down into the drainage.
- Fine mesh, weed barrier fabric, or fiberglass screen
- Cut to fit snugly; avoid metal screens that can corrode
3. Substrate Layer (The Root Zone)
A rich but well-draining substrate is key to long-term success.
For non-bioactive terrariums, blend:
- 40% coco coir or sphagnum peat (water retention)
- 30% fine orchid bark (structure, aeration)
- 20% pumice or perlite (drainage)
- 10% leaf litter or worm castings (gentle nutrients)
- 40% coco coir / peat substitute
- 30% fine orchid bark
- 20% lava rock / pumice
- 10% shredded leaf litter
For bioactive terrariums, use a “vivarium-style” mix:
Moisten the mix until it feels like a wrung-out sponge—damp, but not dripping—before adding it to your vessel.
Step 3: Selecting Plants & Mosses
General Plant Rules
- Choose slow-growing, compact species
- Prefer plants that naturally thrive in low to medium light, high humidity
- Match your plant palette to either tropical closed or airy open conditions
Tried-and-True Terrarium Plants
For Closed / Humid Terrariums:
- Ferns: Adiantum raddianum (maidenhair), Pellaea rotundifolia (button fern)
- Miniature aroids: Philodendron micans, Anthurium clarinervium seedlings
- Creepers: Ficus pumila, Peperomia prostrata
- Textural foliage: Fittonia albivenis (nerve plant), Pilea depressa, Hemigraphis sp.
- Small peperomias: Peperomia caperata, P. obtusifolia dwarf forms
- Semi-succulents: Hoya curtisii (away from the wettest areas)
- Ornamental grasses and sedges: only in large, well-ventilated vessels
For Open / Airier Terrariums:
Avoid most full desert succulents and cacti in classic sealed terrariums—they dislike the persistent humidity and stagnant air.
Mosses: The Living Carpet
Mosses blur hard edges, cover soil, and stabilize humidity.
- Sheet Moss (Hypnum sp.) – Drapes over slopes, forms lush mats
- Cushion Moss (Leucobryum glaucum) – Rounded, cushion-like mounds
- Haircap Moss (Polytrichum sp.) – Taller, forest-floor look; best in larger builds
Source ethically: prefer captive-propagated or nursery-cultivated moss. If you collect locally, ensure it’s legal and take only small amounts from abundant patches.
Before planting, rinse moss in dechlorinated water to remove debris and potential hitchhikers you don’t want.
Step 4: Sculpting the Landscape
Now the terrarium shifts from construction to composition.
Shape the Terrain
Mound substrate higher at the back or along one side to create depth. Press gently to firm the slope.
Place Hardscape
Add stones, driftwood, or cork bark. Partially bury them to make them look anchored, not perched.
Planting Technique
- Use long tweezers to minimize smearing the glass - Dig small holes with a chopstick, tuck roots in, and firm the soil gently - Plant taller species toward the back, creepers in front, and moss last
Apply Moss
Press moss fragments firmly onto the substrate and hardscape. They need intimate contact with a moist surface to root.
Finish with a light misting to settle particles and hydrate foliage.
Step 5: Introducing a Bioactive Cleanup Crew
A bioactive terrarium mimics natural decomposition cycles. Tiny invertebrates act as janitors, nibbling at decaying leaves, mold, and waste.
Key Cleanup Crew Species
- Springtails (Collembola)
Minute, white insects that hop like fleas. They feed on mold, fungi, and decaying organic matter.
- Isopods (Woodlice / Roly-Polies)
- Trichorhina tomentosa (dwarf white) – tiny, unobtrusive
- Armadillidium vulgare – larger, visible, and charming
Small crustaceans that graze on fallen leaves, old roots, and leftover food (for vivaria with animals). Good beginner species include:
Adding the Crew
- Introduce springtails by pouring part of their culture water directly into the substrate or onto a piece of charcoal
- Add a small starter colony of isopods onto leaf litter or beneath a piece of bark
Provide leaf litter (oak, magnolia, or Indian almond leaves) as a continuous food source and hiding layer.
Step 6: Humidity, Watering & Ventilation
Humidity
- Closed terrariums thrive at 70–95% relative humidity.
- Open terrariums sit lower, typically 50–70%, depending on the room.
- Light morning condensation that clears by midday → ideal
- Heavy, persistent fogging → too wet, crack the lid or vent more
- Dry glass, wilting plants → too dry, mist and partially seal
Look for condensation patterns:
Watering
In a closed terrarium, you may water only a few times per year.
- Use a pipette, syringe, or narrow-spout watering bottle to avoid flooding
- Water directly into the substrate, not onto foliage
- Never fill above the drainage layer; the waterline should stay hidden under the soil
In an open terrarium, treat it like a houseplant with better humidity: water when the top 1–2 cm (½ in) of substrate feels slightly dry.
Step 7: Lighting the Miniature Canopy
Terrariums prefer bright, indirect light.
Natural Light
- Place near an east- or north-facing window or a bright spot out of direct sun
- Avoid magnified midday sunlight, which can cook plants through the glass
Artificial Light
If your space is dim, use a simple LED grow light:
- 6,500 K “daylight” spectrum, 6–12 inches above the terrarium
- Run 8–12 hours daily on a timer
- Leggy, stretched stems → not enough light
- Scorched, bleached leaves or algae blooms → too much light
Signs of trouble:
Step 8: Long-Term Care & Observation
A terrarium isn’t completely “set and forget”; it’s more like tending a very slow-motion garden.
Routine Maintenance
- Pruning: Trim back aggressive growers before they press against the glass. Always use clean scissors.
- Leaf Litter: Top up with a handful of dried leaves every few months in bioactive setups.
- Glass Cleaning: Use a microfiber cloth or soft brush on the outside; for the inside, long-handled swabs or a gentle wipe with damp paper towel held in tweezers.
Watching for Imbalances
- Mold: A thin white fuzz on wood or leaves is normal and often temporary—springtails will usually clear it. Remove heavily moldy pieces if it persists.
- Pests: Fungus gnats may appear if the substrate stays constantly waterlogged. Let the top layer dry slightly between mistings, and use yellow sticky traps outside the glass.
- Nutrient Issues: Pale, yellowing leaves can indicate depletion; in very old terrariums, consider a tiny dose of dilute, organic fertilizer, applied cautiously.
The best tool you have is patient observation. Sit with your terrarium. Notice new fronds uncurling, moss brightening after misting, isopods foraging when the lights dim. Over time, you’ll learn the subtle language of your glass-grown ecosystem.
Final Thoughts
Terrarium building is a collaboration: you provide the initial architecture and inhabitants; gravity, moisture, and time take over from there. By understanding layers, plant and moss selection, cleanup crews, and the rhythms of light and humidity, you can create a self-tuning habitat that rewards you with quiet, continual growth.
Start simple. Build one balanced world, then another. Soon your windowsill becomes a constellation of tiny climates—each a study in how life colonizes even the smallest shard of earth beneath glass.