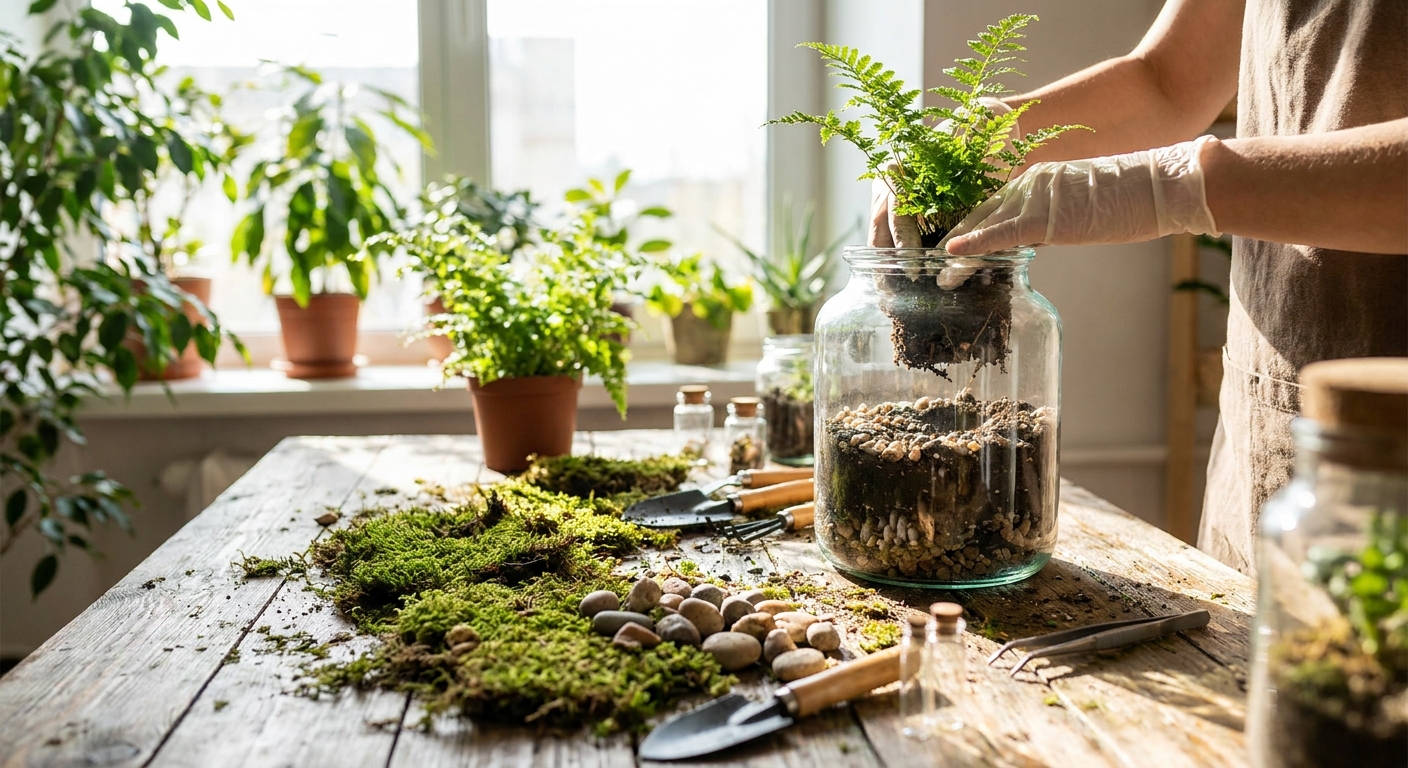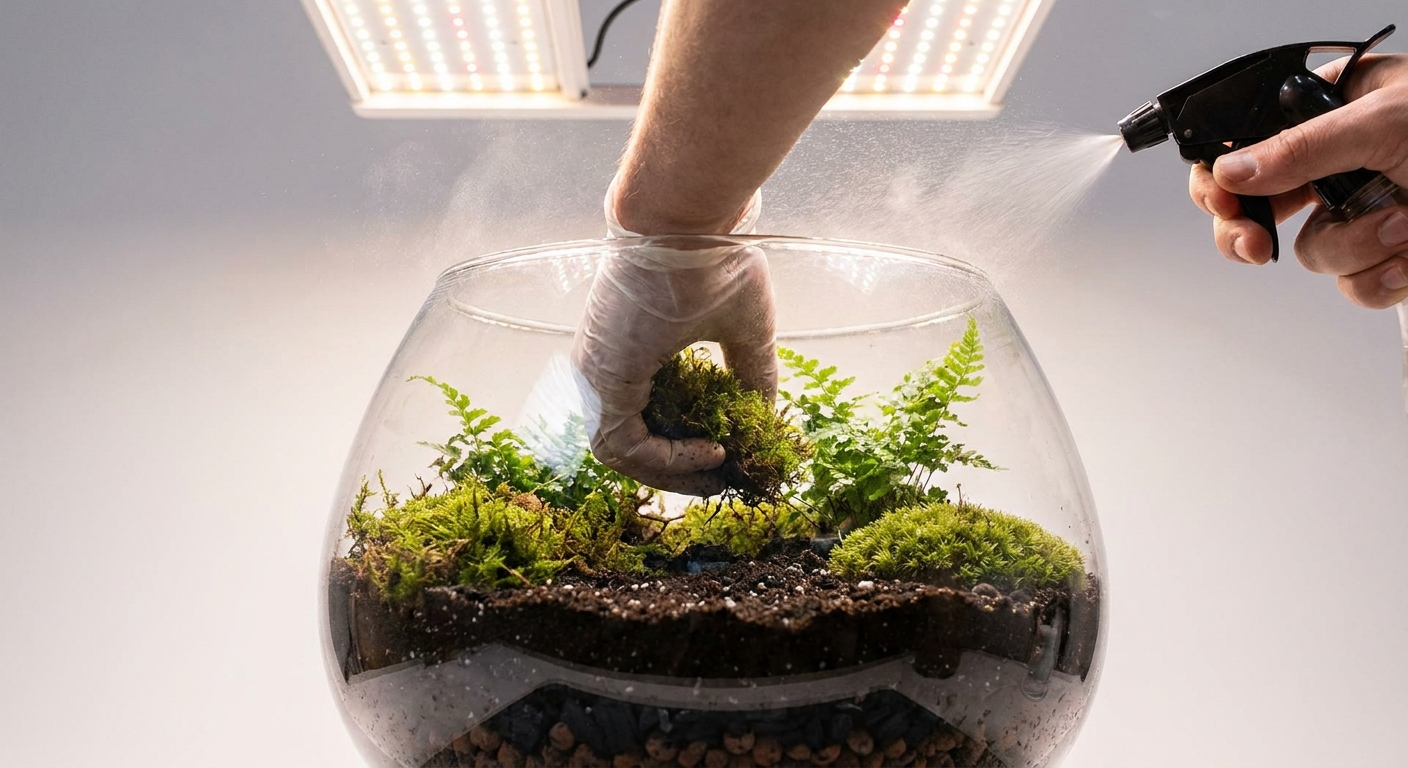
A thriving bioactive terrarium feels less like a decoration and more like a breathing object. The glass sweats in the morning, pill bugs shuffle through leaf litter at dusk, and a fern slowly claims its corner of the world.
Why Bioactive Terrariums Begin with Gear and Glass
This is not accidental. It’s the result of deliberate choices: which glass vessel, what tools, how you layer your substrates, which plants and mosses you invite in, and how you support a living cleanup crew under the canopy.
This article takes an engineering‑style look at building and maintaining a miniature rainforest in glass—step by step, from hardware to habitat.
Step 1: Selecting the Right Glass for a Rainforest Build
For a rainforest‑style terrarium, glass isn’t merely a container; it’s your climate shell.
Key Design Criteria
Closure
- Prefer fully closed or tightly lidded vessels to retain high humidity. - Cork, ground‑glass, and gasketed metal lids each hold moisture differently—cork breathes a little, gaskets lock humidity in.
- Surface Area vs. Height
- Taller jars/cylinders (20–40 cm) allow vertical planting—vines, climbing moss, branching wood.
- Wider bases support more stable microclimates and give roots room to branch.
Access Opening
- Narrow‑neck bottles look magical, but require specialized gear (long tweezers, planting rods). - Wide‑mouth barrels and cookie jars simplify maintenance and pruning.
For your first bioactive rainforest in glass, choose a clear, wide‑mouthed container between 5 and 15 liters with a snug lid. This volume is forgiving: temperature and humidity changes happen slowly, giving you time to respond.
Step 2: Assembling a Purpose‑Built Terrarium Tool Kit
Think of your kit as an extension of your hands inside the glass.
Essential Tools
- Long stainless steel tweezers (30–45 cm): for placing plants, moss, and hardscape with precision.
- Curved aquascaping scissors: to trim stems without disturbing nearby roots.
- Substrate scoop or narrow spoon: to pour substrates along slopes and behind rocks.
- Compact spray bottle (fine mist): for gradual humidity adjustments and leaf rinsing.
- Turkey baster or pipette: to add water directly to the base or remove excess from the drainage layer.
- Soft brush (camel hair or similar): to clean dust off leaves and moss and groom substrate.
Helpful Extras
- LED strip or clamp light with gooseneck arm: full-spectrum, 8–12 W, low heat.
- Digital hygrometer/thermometer: tiny ones can sit inside the terrarium for data.
- Magnifying glass: to inspect springtails, isopods, and nascent fungal webs in the leaf litter.
Having these tools within reach turns maintenance from a chore into quiet ritual.
Step 3: Building a Bioactive Substrate System
A rainforest terrarium is only as stable as the substrate underfoot. Instead of a generic potting mix, build a layered, breathable system that encourages fungi, roots, and microfauna.
3.1 Drainage and Reservoir
Goal: Capture surplus water so roots never sit in a swamp, yet maintain a moist microclimate.
Materials:
- Expanded clay (LECA), lava rock, or a mix of lava and coarse pumice (6–12 mm).
- Minimum 3–4 cm for medium vessels; up to 6–8 cm in tall, narrow builds.
Depth:
Technique:
- Rinse the drainage media to remove dust.
- Add as a level base, then gently slope toward one corner—this becomes your invisible “sump” where you can withdraw water with a baster.
- Lay a barrier layer: fine plastic mesh, polyester window screen, or a double layer of coffee filter over the drainage layer.
3.2 Bioactive Soil Blend
A forest floor is spongy, aerated, and laced with organic debris. Recreate that with a custom mix.
Standard closed‑rainforest blend (by volume):
- 35% coco coir or peat (sifted to remove sticks)
- 25% fine orchid bark or shredded fern fiber
- 20% pumice or perlite
- 10% charcoal (horticultural)
- 10% shredded leaf litter, decayed wood chips, and a small pinch of decomposed compost
Aim for a texture that compresses slightly in your fist but springs back when released. If it holds a shape like modeling clay, lighten it with more pumice.
Depth: 6–12 cm depending on vessel height and root depth of chosen plants.
3.3 Litter and Microhabitat Layer
On top of the soil, add structure and food for your cleanup crew:
- A scattering of baked or frozen leaf litter (oak, magnolia, Indian almond).
- Thin, soft pieces of rotting wood (cholla, cork, or naturally decayed hardwood).
- A sprinkling of live moss fragments around hardscape edges where moisture clings.
This layer will gradually darken and web over with fungal mycelium—the base of your nutrient cycle.
Step 4: Choosing Plants and Mosses for a Glass Rainforest
Bioactive rainforest builds favor species that enjoy consistent moisture, high humidity, and soft, filtered light.
4.1 Structural Plants (Back and Midground)
- Miniature ferns:
- Nephrolepis exaltata ‘Duffii’ (button fern)
- Pteris ensiformis ‘Evergemiensis’ (slender variegated fronds)
- Vining and creeping species:
- Ficus pumila ‘Quercifolia’ – tiny oak‑shaped leaves that climb wood and stone.
- Philodendron micans (smaller cuttings) in larger builds.
- Rhizomatous accents:
- Microsorum species (small forms), rhizomes tucked along wood.
4.2 Foreground and Groundcover Plants
- *Nerve plants (Fittonia albivenis) – vivid veining in pink, red, or white.
- Compact Peperomia (e.g., P. rosso, P. ‘Hope’) for fleshy, textural leaves.
- Selaginella kraussiana and allies for a moss‑like, ferny carpet feel.
4.3 Moss Selection and Placement
Moss does more than beautify; it stabilizes moisture and harbors microfauna.
- Sheet moss (Hypnum, Thuidium): drape over slopes and root bases.
- Cushion moss (Leucobryum, Dicranum): for hillocks, mounds, and the base of wood.
- Locally foraged moss (from clean, pesticide‑free areas): rinse gently to remove soil and hitchhikers, then quarantine for a week before use.
Place moss where it can sip from moist substrate but avoid constant waterlogging—edges of stones, the foot of wood, and gentle slopes.
Step 5: Introducing a Cleanup Crew for a True Bioactive System
A rainforest isn’t sterile; it’s busy with decomposers. In glass, your cleanup crew keeps waste cycling and mold in check.
5.1 Springtails (The First Responders)
- Species: common “temperate white” springtails are perfect.
- Function: graze on mold, algae, and fine organic films.
- How to add: pour a portion of their culture (with substrate) onto the substrate and moss after initial planting. Mist to settle them in.
5.2 Isopods (The Leaf Litter Crew)
For terrarium‑scale builds, choose smaller, moisture‑loving species:
- Trichorhina tomentosa (dwarf whites): extremely small, breed well, and rarely disturb roots.
- Tiny Armadillidium or Porcellionides* species in larger containers.
Add them after plants are established (2–3 weeks), so there is some natural leaf drop and fungal growth.
Care tips:
- Maintain a gradient: one area with thicker moss and wetter soil, another slightly drier with more bark and leaf layers.
- Periodically add a few new leaves or a tiny flake of dried seaweed for calcium and minerals.
Step 6: Humidity, Ventilation, and Lighting
6.1 Managing Humidity and Air Exchange
Inside glass, water moves constantly: evaporating from the soil, condensing on the walls, raining back down.
Targets for a rainforest build:
- Humidity: 75–95% for most of the day.
- Ventilation: minimal but regular—think slow breathing, not a draft.
- For the first two weeks, open the lid 5–10 minutes every day to allow gas exchange.
- Watch condensation:
- Light fog on part of the glass: good.
- Droplets streaming continuously: too sealed and wet—vent longer and/or reduce water.
Practical approach:
If the glass dries fully each day and moss curls, increase watering slightly or reduce airflow.
6.2 Lighting the Rainforest Under Glass
Rainforests are bright, but their understories are filtered and soft.
- Place the terrarium where it receives bright, indirect light—an east window or a bright north window is ideal.
- Avoid direct midday sun on the glass; use sheer curtains if necessary.
- Choose a 5,000–6,500 K LED with even spread.
- Position 15–30 cm above the lid, depending on intensity.
- Run for 10–12 hours/day on a timer for consistency.
- Stretching, pale leaves: increase light intensity or duration slightly.
- Scorched patches or moss bleaching: reduce intensity or raise the light.
For artificial lighting:
Observe your plants:
Step 7: Long‑Term Care and Troubleshooting
Once established, a well‑built bioactive terrarium is slow to change but never static.
7.1 Routine Maintenance
Weekly to biweekly:
- Inspect leaves and stems for yellowing, melt, or pests.
- Wipe interior glass gently with a soft cloth or sponge to keep views clear.
- Prune wayward vines and trim Fittonia or Selaginella to encourage bushier growth.
- Check the drainage layer for standing water depth (use a flashlight and baster).
- Add a palmful of fresh leaf litter if the surface layer is mostly skeletonized.
- Note plant growth patterns; consider rotating the terrarium a quarter turn for even light.
Monthly:
7.2 Common Issues and Adjustments
1. Persistent Mold on Wood or Leaf Litter
- Mild, white fuzz is natural and often eaten by springtails.
- If it thickens and spreads:
- Increase daily ventilation time.
- Reduce watering slightly and focus water deeper into the substrate rather than on surfaces.
- Remove heavily colonized leaves and replace with drier ones.
- Cause: overly saturated soil and poor air exchange.
- Response:
- Open the terrarium for several hours or even a full day.
- Carefully remove mushy plant bases; replant only healthy tops if possible.
- Consider adding more pumice or bark in that area during a partial rebuild.
- If springtails or isopods seem to vanish:
- Check that pesticide‑free materials were used.
- Add more food (leaf litter, tiny piece of vegetable peel that you remove after a day or two if uneaten).
- Ensure at least one consistently damp microzone under moss or bark.
2. Plants Rotting at the Base
3. Cleanup Crew Decline
Step 8: Iterating Your Design
No two rainforest terrariums age the same way. Over months:
- Roots push against glass, tracing pale lines through the soil profile.
- Moss thickens, mottling from lime green to deep forest shades.
- Leaf litter becomes patchwork—new and crisp, old and lace‑holed.
Your role gradually shifts from builder to caretaker, then to student. Take notes on what works in your specific glass, in your specific room, under your specific light. Adjust plant lists, tweak substrate recipes, experiment with new cleanup species.
The gear stays simple: clear glass, a few reliable tools, well‑chosen lights. The complexity, the quiet drama—that comes from the living world you’ve invited inside.
With each new build, you refine your engineering—but also your eye. Soon, a fresh piece of glass will no longer look empty. It will look like potential: a future rainforest, waiting to condense on the inside of its own skin.